Changing a keypad PIN won’t remove a remote already paired with the opener. Garage door remote programming in Yakima starts by clearing old codes, then pairing the remotes, keypad, or connected module you want to use. A weak remote battery can also mimic a pairing problem.
A remote that stops working is frustrating, especially after a power outage or when setting up a replacement. The right steps for garage door remote programming in Yakima depend on opener and remote compatibility, so repeating the same button sequence may not help. This guide explains how to clear stored codes, pair remotes and keypads, reconnect Wi-Fi modules, and check compatibility. It also covers what to try after an outage and when an opener may need repair rather than another reset.
Key Takeaways
- Changing a keypad PIN doesn’t erase remotes already stored in the opener; clearing its memory and pairing authorized devices resets access.
- Remote, keypad, vehicle, and Wi-Fi setup steps depend on the opener model, so use the instructions that match the equipment.
- Before replacing a remote, consider compatibility and a weak battery, which can make a working device seem unpaired.
- If programming fails after an outage or the opener itself isn’t responding, opener replacement may be the more appropriate next step.
Clearing opener memory and removing previous owners’ remotes
Identify the opener before changing its memory. Check the label on the motor housing or beneath the light cover for the brand and model number. For a ceiling-mounted unit, view it safely from the floor or a securely positioned ladder. The model determines which reset and pairing instructions apply.
Changing a keypad PIN does not remove a remote already paired with the opener. To remove previous users’ access, follow the model-specific procedure for clearing memory, then pair the remotes and keypad you want to keep. Treat resetting and re-pairing as separate steps: clearing stored codes removes existing access, while pairing restores access to selected devices.
For example, after moving into a Yakima home, reset the opener before pairing your own remote. Follow the manufacturer’s instructions for the exact model, since button sequences differ. Genie, LiftMaster, Raynor, and Chamberlain publish opener programming instructions on their websites. A vehicle owner’s manual may also explain how to pair its built-in remote.
In Yakima, garage door service companies that work on openers can help with programming or opener repairs. Remote pairing is model-specific, and a mechanical fault may require repair or replacement rather than another reset.
When replacing or installing an opener, compatibility involves more than the remote. The opener must suit the door, and the door must be balanced so the opener isn’t compensating for a mechanical problem. A poorly balanced door may still operate badly after new controls are paired. A service assessment can help distinguish a control issue from a door problem.
Drive type and smart features also affect setup. Chain, belt, and screw-drive openers use different mechanisms, while connected features rely on compatible controls. If repeated resets fail or the existing opener cannot support the controls you need, consider replacement instead of repeating the same procedure.
Pairing remotes, keypads, and Wi-Fi modules
Pair each control using the opener’s model-specific sequence. A remote, keypad, vehicle button, and Wi-Fi module may each need to be set up separately.
Finding the Learn Button
On common Genie, LiftMaster, Raynor, and Chamberlain openers, look for the Learn or Program button on the motor unit. It’s often near the antenna wire, beneath the light cover, or beside the wiring terminals. Its exact position varies by model, so use the model number and instructions to locate the right button.
Have the opener’s model instructions nearby before you begin. The Learn button starts pairing, but the timing and button sequence vary. Pressing the wrong control may interrupt setup or activate a different function.
Programming Safety Precautions
Keep the doorway clear while pairing, and watch the door during any test. Keep hands, tools, and people away from moving sections and tracks. Don’t adjust springs, cables, or other door hardware as part of remote programming. Those components are separate from the electronic pairing process.
Use a stable position to reach the motor unit, and never climb on the door or opener. Follow the manufacturer’s instructions for the specific model. Stop if the door moves unexpectedly or the opener behaves irregularly. Repeated button presses won’t fix a mechanical fault.
Pairing Remotes, Keypads, and Vehicle Controls
On many modern openers, pair a vehicle’s built-in remote by pressing the opener’s Program button, then pressing the vehicle’s remote button. Follow the vehicle manual for its corresponding steps. Pair a keypad separately and program it for each opener it controls. If a keypad operates two doors, it needs a separate pairing process for each opener.
Choose a keypad location that’s convenient to reach without standing in the door’s path. Enter a PIN following the keypad’s instructions, then test it with the doorway clear. For a Wi-Fi module, use the setup sequence for its compatible opener and confirm the connection before relying on app control. If the opener won’t enter pairing mode, opener replacement service may be the next practical step.
Garage door remote compatibility and frequency
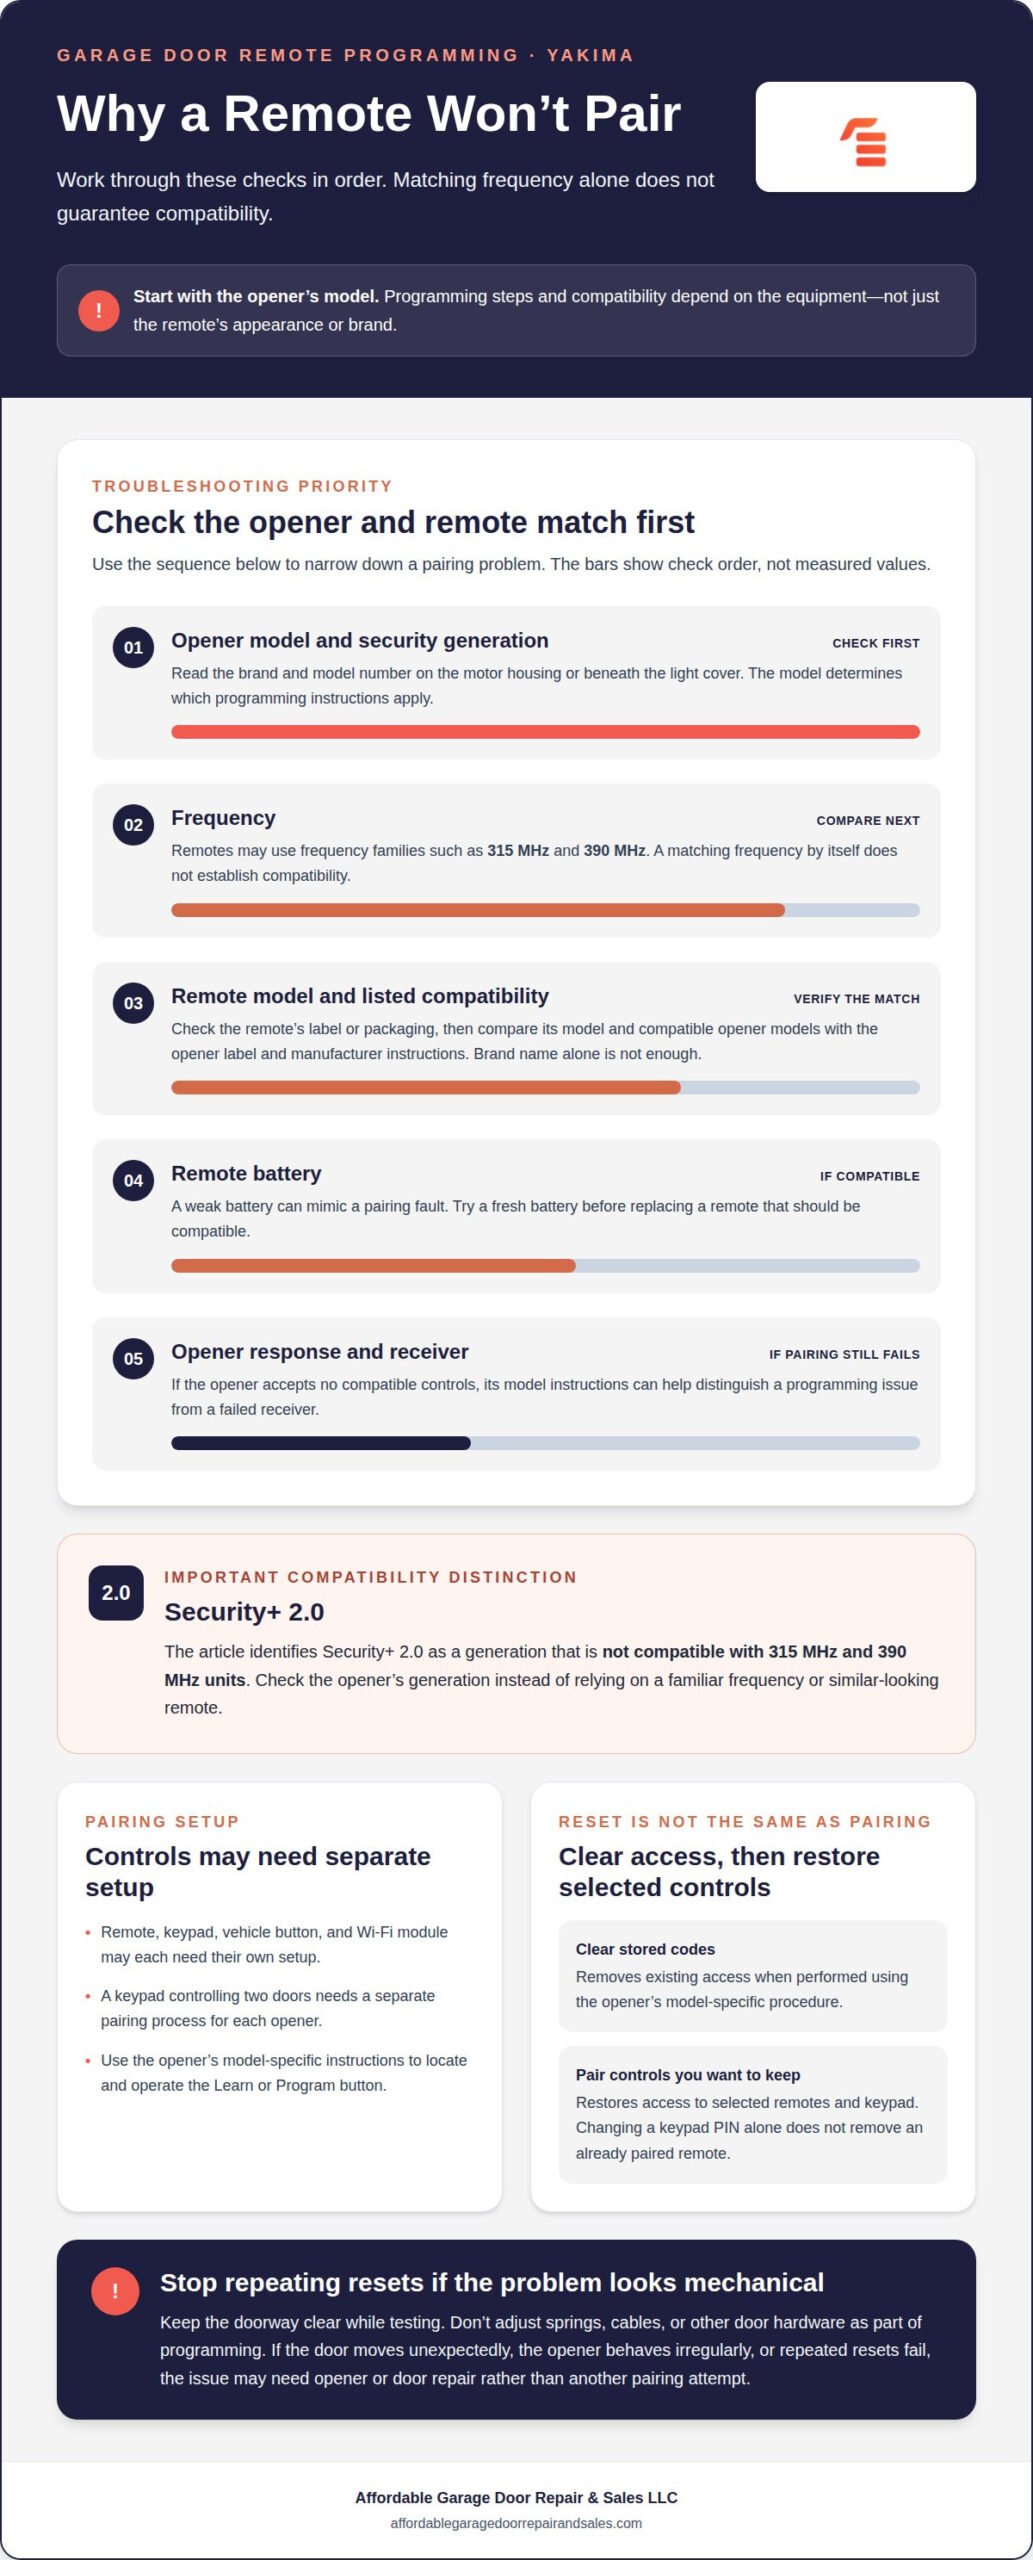
Frequency is one compatibility check, not the whole test. Garage door remotes use frequency families such as 315 MHz and 390 MHz. A matching frequency alone doesn’t establish compatibility. The opener’s model and security generation also matter, so compare the remote with the opener instructions before pairing.
Security+ 2.0 is a garage door opener generation that is not compatible with 315 MHz and 390 MHz units. That distinction can explain why a remote with a familiar frequency fails. Check the opener’s model information and generation, rather than relying on the remote’s appearance or button layout.
Check the remote’s packaging or label for its frequency and compatible opener models. Compare those details with the opener’s label and manufacturer instructions. Genie, LiftMaster, Raynor, and Chamberlain provide model-specific programming guidance. The brand name alone isn’t enough: two openers from the same manufacturer may use different systems.
If the remote has no readable label, use its model number to find its specifications in the product instructions. Match that information against the opener’s model, not just its age or exterior design. For example, a 315 MHz remote still won’t work with an opener generation identified as incompatible with that frequency family.
Compatibility also matters when choosing a replacement remote. Confirm that the opener model is included in the remote’s compatibility information before pairing. A control that looks similar may use a different frequency or security generation. Repeated attempts won’t resolve a mismatch between the remote and opener.
If a compatible remote still fails, consider other causes before replacing the opener. A weak battery can mimic a pairing fault, so try a fresh battery. If the opener accepts no compatible controls, the model’s instructions can help distinguish a programming issue from a failed receiver.
Pairing remotes after a power outage
After power returns, test the opener before pairing anything. Use the wall control, then try one remote from close range. If the wall control works but the remote doesn’t, check the remote, its battery, and its pairing. If neither control works, confirm that the opener has power before changing stored settings. An outage alone doesn’t mean the remotes need reprogramming.
Next, find the opener’s brand and model on its label. Follow the matching manufacturer instructions for recovery. Genie, LiftMaster, Raynor, and Chamberlain provide model-specific programming guidance. Don’t assume one brand’s button timing applies to another. If the instructions call for pairing, follow the sequence exactly, then test the remote with the doorway clear.
A weak remote battery can mimic a pairing fault. Replace it with the battery type specified for that remote, then try the existing control again. For an opener with backup power, include its battery in the diagnosis. Backup batteries typically need replacement every 3-5 years, following the manufacturer’s schedule. A depleted backup battery and an unpaired remote are different issues, so assess each separately.
If a remote still fails, pair one control at a time. This makes it easier to tell whether the issue follows one remote or affects every control. If a keypad or vehicle button also stopped working, follow its own instructions, since each device may have a separate pairing sequence. Avoid clearing opener memory as a first step: existing controls will need to be paired again.
Stop troubleshooting if the door behaves irregularly or the opener remains unresponsive. A power interruption can reveal an existing opener or door problem, not just a control issue. For help diagnosing an opener that won’t respond after an outage, request garage door repair assistance.
Affordable Garage Door Repair & Sales: Sectional & Roll-Up Doors
Affordable Garage Door Repair & Sales can help when remote pairing points to a problem with the opener or door. A reset won’t fix a failed opener, broken spring, or unbalanced door. Continued operation may also make the underlying issue harder to diagnose.
If the opener no longer responds reliably, replacement may be the right next step. Spring repair addresses a mechanical issue that can affect door movement, while sectional and roll-up door service focuses on the door itself. The right solution depends on whether the problem is electronic, mechanical, or related to the door’s operation.
If repeated pairing attempts leave the opener unresponsive, note what happens when you use the wall control and remote. Contact Affordable Garage Door Repair & Sales to discuss the issue and repair options.
Get the Door Working Reliably Again
If programming isn’t the only issue, consider the garage door system as a whole. Reliable garage door remote programming in Yakima depends on controls working with an opener that can operate the door properly. If the opener doesn’t respond or the door’s movement suggests a mechanical fault, another reset won’t address the cause.
Affordable Garage Door Repair & Sales LLC offers opener replacement, spring repair, and broken spring repair. These services address different problems: opener replacement concerns the operating unit, while spring repair addresses door hardware. Choosing the right repair starts with identifying what is preventing normal operation.
Share what the opener and door do when you use the controls, including any unusual movement or sounds. That detail helps direct attention to the relevant issue. For help with the next step, contact Affordable Garage Door Repair & Sales LLC. A clear diagnosis can put you on a practical path toward dependable access again.
Frequently Asked Questions
How do I program a garage door remote to a garage door opener?
Use the instructions for your opener’s exact model and follow its pairing sequence. Many modern openers start pairing with the Program button, followed by a press of the remote button. Test the remote with the doorway clear. If the opener doesn’t respond, first distinguish a control problem from a power or mechanical issue. A remote can’t fix a jammed door or an opener without power.
How do I program a universal garage door remote?
Match the universal remote to the opener’s brand and model using the remote’s instructions. “Universal” doesn’t mean compatible with every opener. Follow the listed setup sequence, then test the remote from a safe position. If pairing fails, confirm the opener is included in the remote’s compatibility information before trying again. Additional programming attempts won’t make a mismatched remote compatible.
How do I erase old garage door remotes from an opener?
Follow the opener manufacturer’s memory-clearing instructions for the specific model. Clearing stored codes removes existing paired controls, so plan to pair the remotes and keypads you still use afterward. If several people use the opener, gather the current devices first and test each one after reprogramming. This helps identify a control that needs attention without mistaking it for an opener-wide failure.
Can I program a garage door remote myself, or do I need a technician?
You can handle straightforward pairing by following the opener and remote instructions, provided the equipment responds normally. A technician is a sensible next step if the opener won’t enter programming mode, the door moves irregularly, or controls remain unresponsive after correct setup. Affordable Garage Door Repair & Sales LLC offers opener replacement and spring repair for mechanical or opener problems that pairing alone won’t resolve.
Which remotes are compatible with LiftMaster, Chamberlain, Genie, and Craftsman openers?
Compatibility depends on the opener’s model and security generation, not just its brand or the remote’s appearance. Check the remote’s listed compatible models against the opener; Security+ 2.0 is incompatible with 315 MHz and 390 MHz remotes.