A blinking garage door opener light often means the opener has detected a problem, not that the bulb has failed. If you’re wondering why your garage door opener light is blinking, first check for an obstruction near the safety sensors or sensors that are out of alignment. Blink patterns vary by opener model, so note which light is flashing and check the sensor indicators to narrow down the cause.
It’s frustrating when the door won’t close and the lights don’t make the problem obvious. The good news is that a clear path and correctly aligned sensors may resolve a common cause without complicated troubleshooting.
This guide explains how to inspect the sensor area, gently clean the lenses, align the sensors, and read their indicator lights. You’ll also learn what to check if the light keeps flashing after these steps or if the door starts closing and then reverses. Follow the steps in order to determine whether the issue is an obstruction, misalignment, or a model-specific opener signal.
Key Takeaways
- Start with the sensor area: a clear path can help you narrow down why the opener is flashing.
- Use the sensor indicator lights to spot a possible alignment issue before adjusting anything.
- Compare the opener’s blink pattern with its model-specific guidance, since diagnostic codes can vary.
- If the light keeps blinking after basic checks, the opener may need further troubleshooting or replacement.
Safety sensor alignment and obstruction checks
Start by checking the door’s path, then inspect the sensors near the floor on opposite sides. Their infrared beam helps the opener detect objects in the way.
Inspect the Door Path for Obstructions
Look along the door’s full path before operating it. Move objects such as a bicycle, storage bin, or fallen branch that could obstruct travel or block a sensor. Check the floor beneath the door, too. Even a small item near the threshold can interrupt the beam or prevent the door from closing smoothly.
Check Safety Sensor Alignment
Examine the sensors mounted low on opposite sides of the door. Their lenses need a clear line of sight across the opening. If one sensor looks tilted or has shifted, gently aim it toward the other. Adjust it until both indicator lights are solid, then tighten the screws to hold it in place.
Clean the Sensor Lenses
Gently wipe each lens with a soft, dry cloth. Dust or smudges can interfere with the infrared beam, even when the sensors look aligned. Avoid using water or cleaners on the lenses. After cleaning, make sure no cobwebs, stored items, or loose materials sit between the sensors.
Check for Changing Sunlight
Notice whether the opener light flashes mainly around sunrise or sunset. Direct sunlight on a sensor can interfere with its beam at those times. Check the sensor area while the problem is happening and look for sunlight falling across either lens. Keep the area clear while you check.
Replace a Failed Opener Bulb or LED
Replace the bulb if it no longer lights or visibly flickers after you’ve seated it correctly. For an LED light, follow the opener manual’s replacement guidance because light assemblies and compatible bulbs vary by model. A diagnostic light that blinks is different from a bulb that fails to illuminate, so identify which light is flashing before replacing anything.
Safety sensor misalignment and troubleshooting
Yes. You can safely check visible sensor obstructions and controls while the door is stationary. Don’t touch springs, cables, or moving parts, and stop if the door is unstable or wiring looks damaged.
Identify Blocked or Misaligned Sensors
Watch the sensor indicators as you operate the door. A flashing red sensor light can point to misalignment or a wiring issue. Ten rapid opener-light flashes during closing can also indicate a sensor problem. Check whether a bracket has shifted or a wire looks loose, but don’t pull or disconnect wiring.
Clean and Align the Sensors
Clear dust from the sensor lenses and check that both units face each other across the doorway. If a sensor is visibly tilted, adjust its position carefully and watch the indicators. Solid lights on both sensors suggest they’re aligned. If an indicator stays off or flickers, don’t keep adjusting the bracket; the wiring or sensor may need attention.
Release the Safety Lock
Check the wall control for a Lock button or lock indicator. This feature can disable remote operation, making the opener seem unresponsive even when the sensors are aligned. If the lock is on, use the wall control’s lock function to release it, then test the remote while standing clear of the door.
Assess Whether Troubleshooting Is Safe
Limit your checks to the visible sensors, wall control, and remote. Don’t bypass the safety beam or place your hands near moving door sections. Stop if the door looks crooked, a cable hangs loose, or wiring is damaged. These signs call for a professional inspection, not further adjustment. Keep people and stored items clear during any test.
Clean the lenses with a soft, dry cloth, without water or cleaners. If the door starts closing and then immediately reverses, a sensor problem may be responsible.
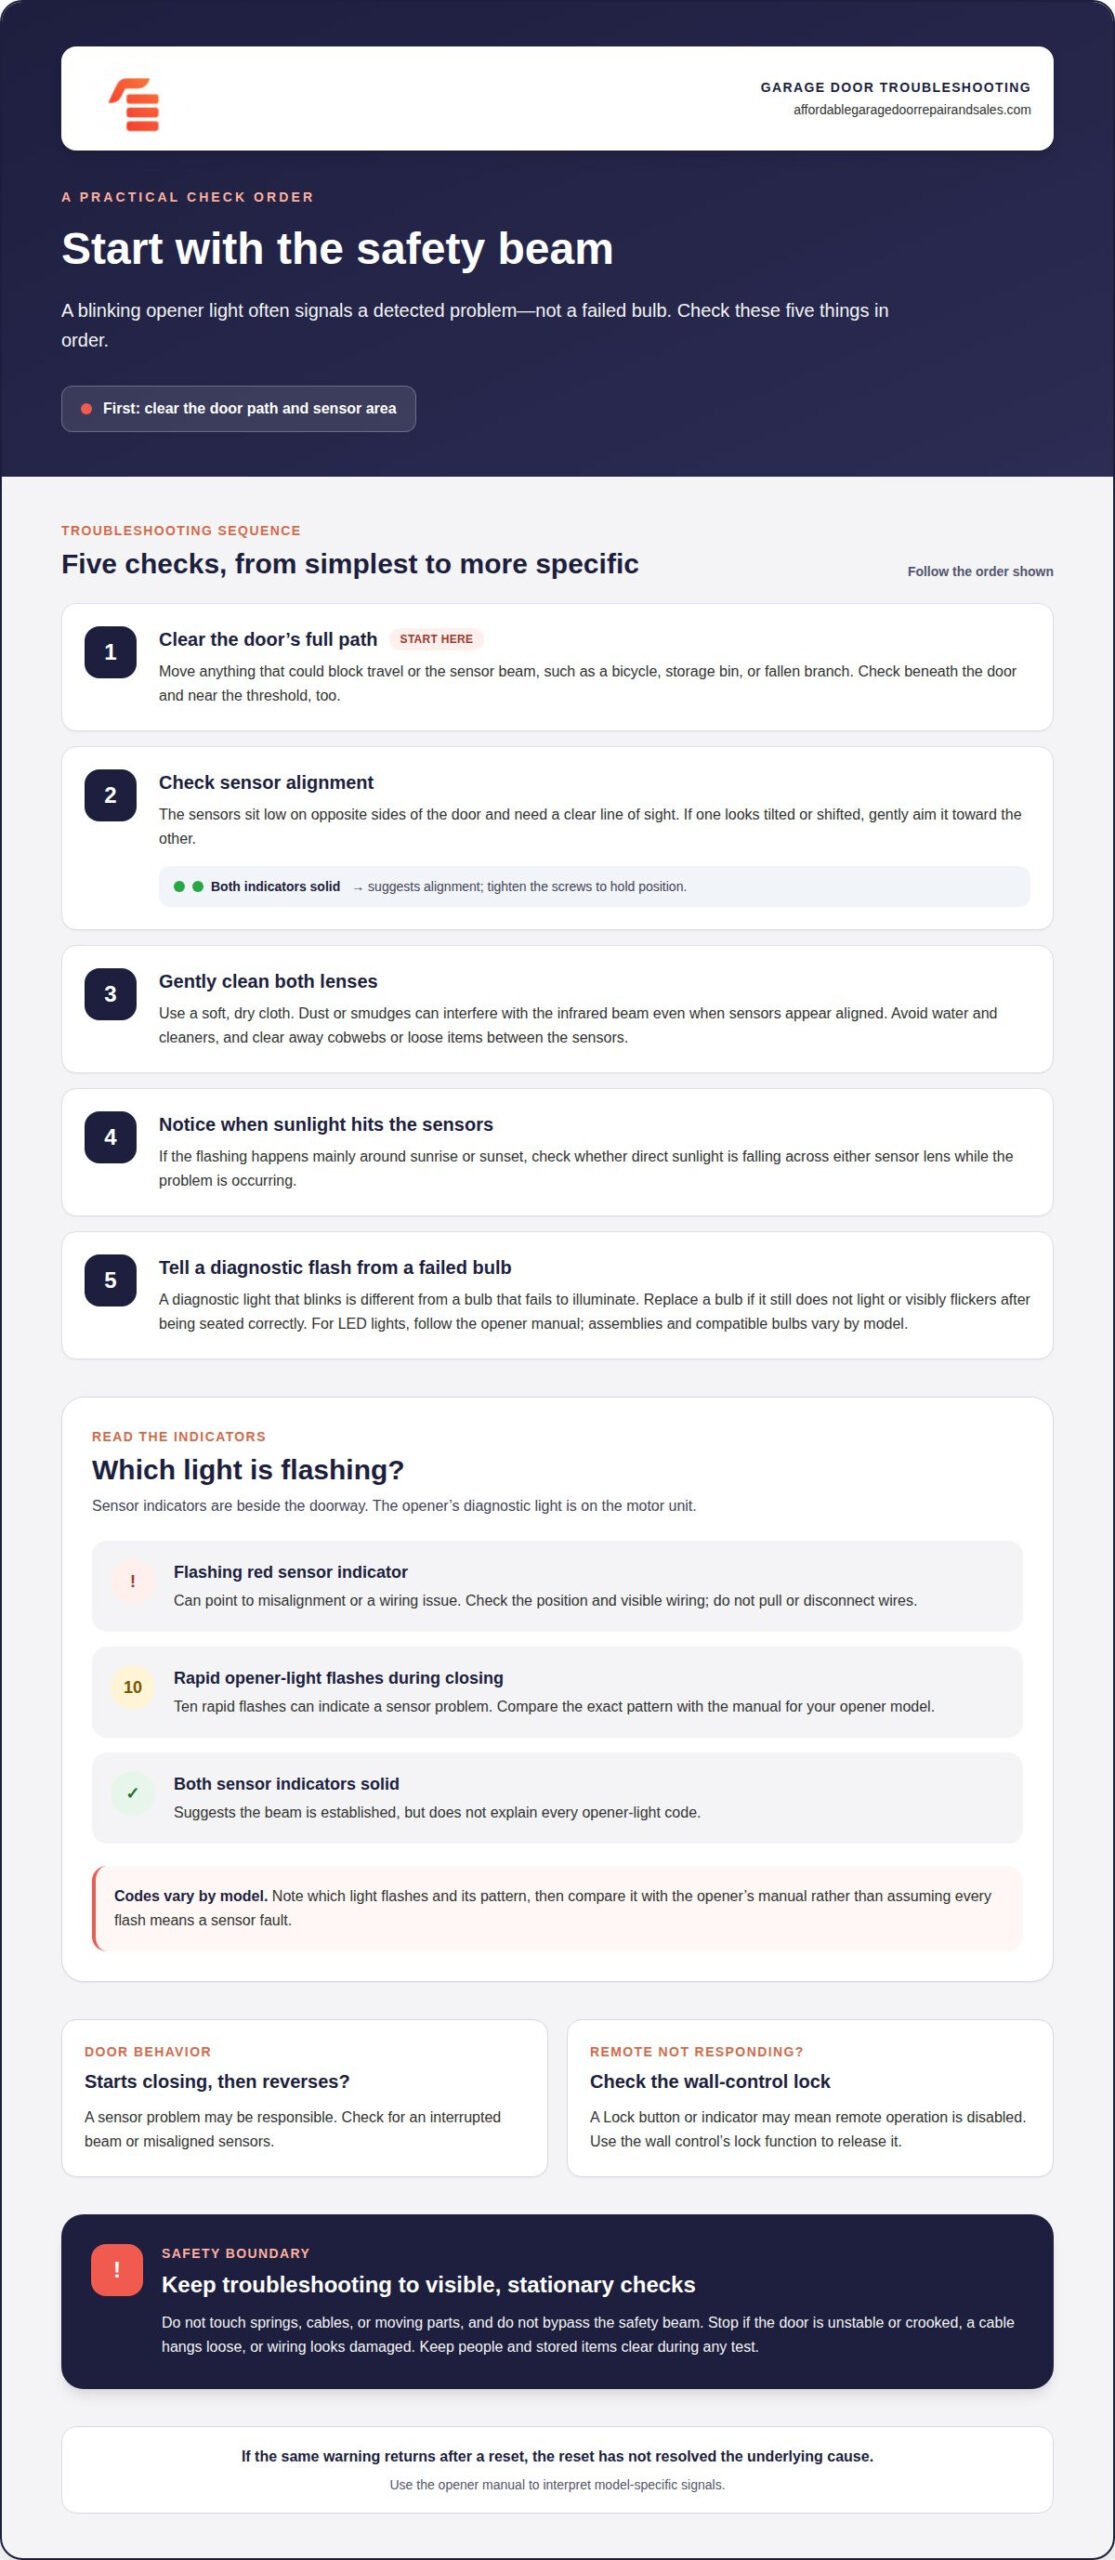
Garage door sensor indicator lights
To reset a blinking opener, press the opener’s LEARN button, then the remote’s LEARN button to reconnect them. Sensor indicators can help identify alignment trouble, but opener blink codes vary by model.
- Check both sensor indicators while the door is stationary. One sensor may show green, while the other shows yellow or orange. These lights can indicate whether each unit has power and the pair is communicating. Note which light changes before adjusting anything.
- Compare the indicators with the door’s behavior. If the door won’t close and a sensor light is flashing, the beam may be interrupted or the sensors may be misaligned. A solid indicator on each sensor suggests the beam is established, but doesn’t explain every opener-light code.
- Watch for changes while you stand clear of the doorway. If an indicator flickers when someone walks past, a person or object may be interrupting the beam. If it remains unstable with the path clear, check the sensor position and visible wiring without pulling or disconnecting anything.
- Distinguish the sensor lights from the opener’s diagnostic light. Sensor indicators sit on the units beside the door; the opener light is mounted on the motor unit. Note which light flashes and the pattern. Because manufacturers use different diagnostic codes, compare the pattern with your opener’s manual.
- Note the indicators before resetting the connection. Press the opener’s LEARN button, then the remote’s LEARN button to reconnect the devices. If the same warning returns, the reset hasn’t resolved the underlying cause. Use the manual for your model to interpret the signal rather than assuming every flash points to a sensor problem.
Why is my garage door opener light blinking and the door not closing?
Compare the opener’s flash pattern with the door’s behavior. The pattern may point to a sensor issue, motor resistance, or another model-specific fault.
- Note how many times the opener light flashes and when it happens. Five fast flashes can indicate overcurrent or motor resistance. Record whether the door starts moving, stops, or reverses; its behavior can help distinguish a travel problem from a warning that appears before movement.
- Check the safety system if the door won’t close or reverses immediately. A blocked beam or misaligned sensors can prevent closing. Check the sensor indicators and the path between them, but don’t force the door through a failed safety check.
- Read the manual for your opener model before interpreting a flash code. Manufacturers use different diagnostic patterns, so five flashes on one opener may not mean the same thing on another. Match the exact pattern and operating condition, such as flashing only during closing, to the model’s guidance.
- Reset the opener only after recording its behavior. Unplug the unit for about 30 seconds, then reconnect it and test the door from a clear position. A reset may clear a temporary fault, but a returning flash pattern means the underlying issue still needs attention.
- Check the keypad separately if it blinks and won’t operate. Three opener flashes can indicate a wiring issue in that situation. Don’t open the motor housing or handle wiring. If the door remains stuck, flashes repeatedly, or shows visible mechanical damage, stop testing and arrange a professional assessment.
If the door still won’t close after these checks, request garage door repair to identify the fault and restore reliable operation.
Affordable Garage Door Repair & Sales: Opener Replacement
Affordable Garage Door Repair & Sales can help if sensor checks and model-specific troubleshooting don’t resolve a blinking opener light. If the opener continues to signal a fault or the door won’t operate reliably, opener replacement may be appropriate. A persistent warning doesn’t automatically mean the opener needs replacing; the symptoms and condition of the unit matter.
If the door’s movement or visible hardware suggests a separate mechanical problem, such as a broken spring, it may need a different repair than opener replacement. Don’t adjust springs yourself. Describing the blinking pattern and what happens when you operate the door can help clarify the issue.
Contact Affordable Garage Door Repair & Sales to discuss the opener problem and the next step.
Choose a Clear Next Step for Your Garage Door
If you’re still asking why is my garage door opener light blinking, describe the pattern and the door’s behavior. This information can help focus attention on the opener or another part of the door system. Stop testing if the door seems unstable or a cable or spring is damaged.
Affordable Garage Door Repair & Sales LLC offers opener replacement when the opener itself needs attention. Its spring repair service addresses broken springs, a separate mechanical issue. Clearly identifying the symptoms helps keep the next step focused on the problem instead of relying on repeated resets.
For a professional assessment of the opener or related door issue, contact Affordable Garage Door Repair & Sales LLC. A clear description of what you observed is a practical place to start.
Frequently Asked Questions
How do I stop my garage door lights from flashing?
First identify which light is flashing, then address its likely cause instead of repeatedly resetting the opener. If only the bulb flickers while the door works normally, the bulb or light assembly may be the issue. If the opener signals a fault during operation, note whether it happens while opening or closing. That timing can help distinguish a persistent warning from a lighting problem.
What do different blinking patterns on garage door opener lights mean?
Blink patterns vary by model, so use the opener’s manual to interpret the exact sequence. For example, three flashes can indicate a keypad wiring issue when the keypad blinks and won’t operate. Five fast flashes can signal overcurrent or motor resistance, while ten rapid flashes during closing can point to a sensor problem. Note which light flashes and what the door is doing.
How do I check and align garage door safety sensors?
Check that each sensor is secure in its bracket and aimed across the doorway at the other sensor. If an indicator changes when you gently adjust a bracket, the sensor may have shifted. After alignment, test the door from a position where you can see it move, keeping people and objects clear. If the bracket won’t stay in place, stop adjusting it.
Could a blinking opener light indicate a remote, wiring, or power problem?
Yes. If the wall control operates the door but the remote doesn’t, the issue may be with the remote rather than the sensors. A blinking keypad that won’t operate can occur with three opener flashes, which may indicate a wiring issue. Don’t open the motor housing or handle wiring. Homeowners in Everett, Puyallup, Seattle, Tacoma, Auburn, Wenatchee, Yakima, Pasco, Ellensburg, and Spokane can contact Affordable Garage Door Repair & Sales LLC for local garage door service.