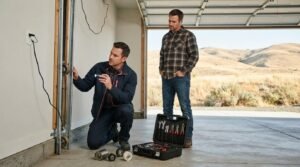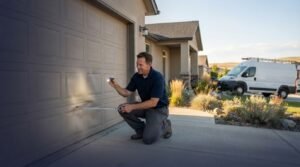
If your garage door won’t fully open or close, leaves a gap at the floor, or changes direction unexpectedly, you may be wondering how to adjust garage door travel limits. But the travel setting may not be the cause. Adjusting the wrong control can mask a mechanical or safety problem instead of fixing it.
Travel limits tell the opener where the door should stop. They’re different from force settings and photo-eye sensors, and each opener has its own manufacturer-approved adjustment steps. Before changing a setting, check whether the opener is the likely source of the problem, rather than the door’s hardware or safety system.
This guide explains what travel limits control, which symptoms may point to a limit setting, and how to make only the adjustments your model’s manual allows. You’ll also learn when to stop testing and arrange professional diagnosis, especially if the door moves unevenly, appears damaged, or still reverses after an adjustment.
Key Takeaways
- Understand how travel limits set the opener’s stopping points and how they differ from force settings.
- Identify your opener’s control type and use its model-specific manual rather than a universal adjustment method.
- Use safe observations to assess whether a travel limit may be involved or another fault needs attention.
- Follow the manufacturer’s instructions, making only the specified small changes when adjusting garage door travel limits.
- Check the door’s movement afterward and know when unresolved or unsafe operation calls for a Washington technician.
What garage door travel limits control, and what they do not
Before deciding how to adjust garage door travel limits, identify what those settings control. Travel is the opener’s programmed range of movement: the point where it stops raising the door and the point where it stops lowering it. These settings define the endpoints. They don’t repair a door that’s binding, unbalanced, or obstructed.
What does a garage door travel limit do?
The open limit tells the opener where to stop raising the door. If it’s set too low, the door may stop before it’s fully open. The close limit sets where the opener stops lowering the door. If the door stops too soon, a gap may remain at the floor. If the setting is wrong, the door may press too firmly against the floor or seal.
Terms, controls, and adjustment methods vary by opener make and model. Some units use manual adjustment screws, while others use electronic programming. The Garage door opener overview explains the basic opener mechanism and safety features. For your specific unit, follow the manufacturer’s manual.
When is a travel-limit adjustment not the answer?
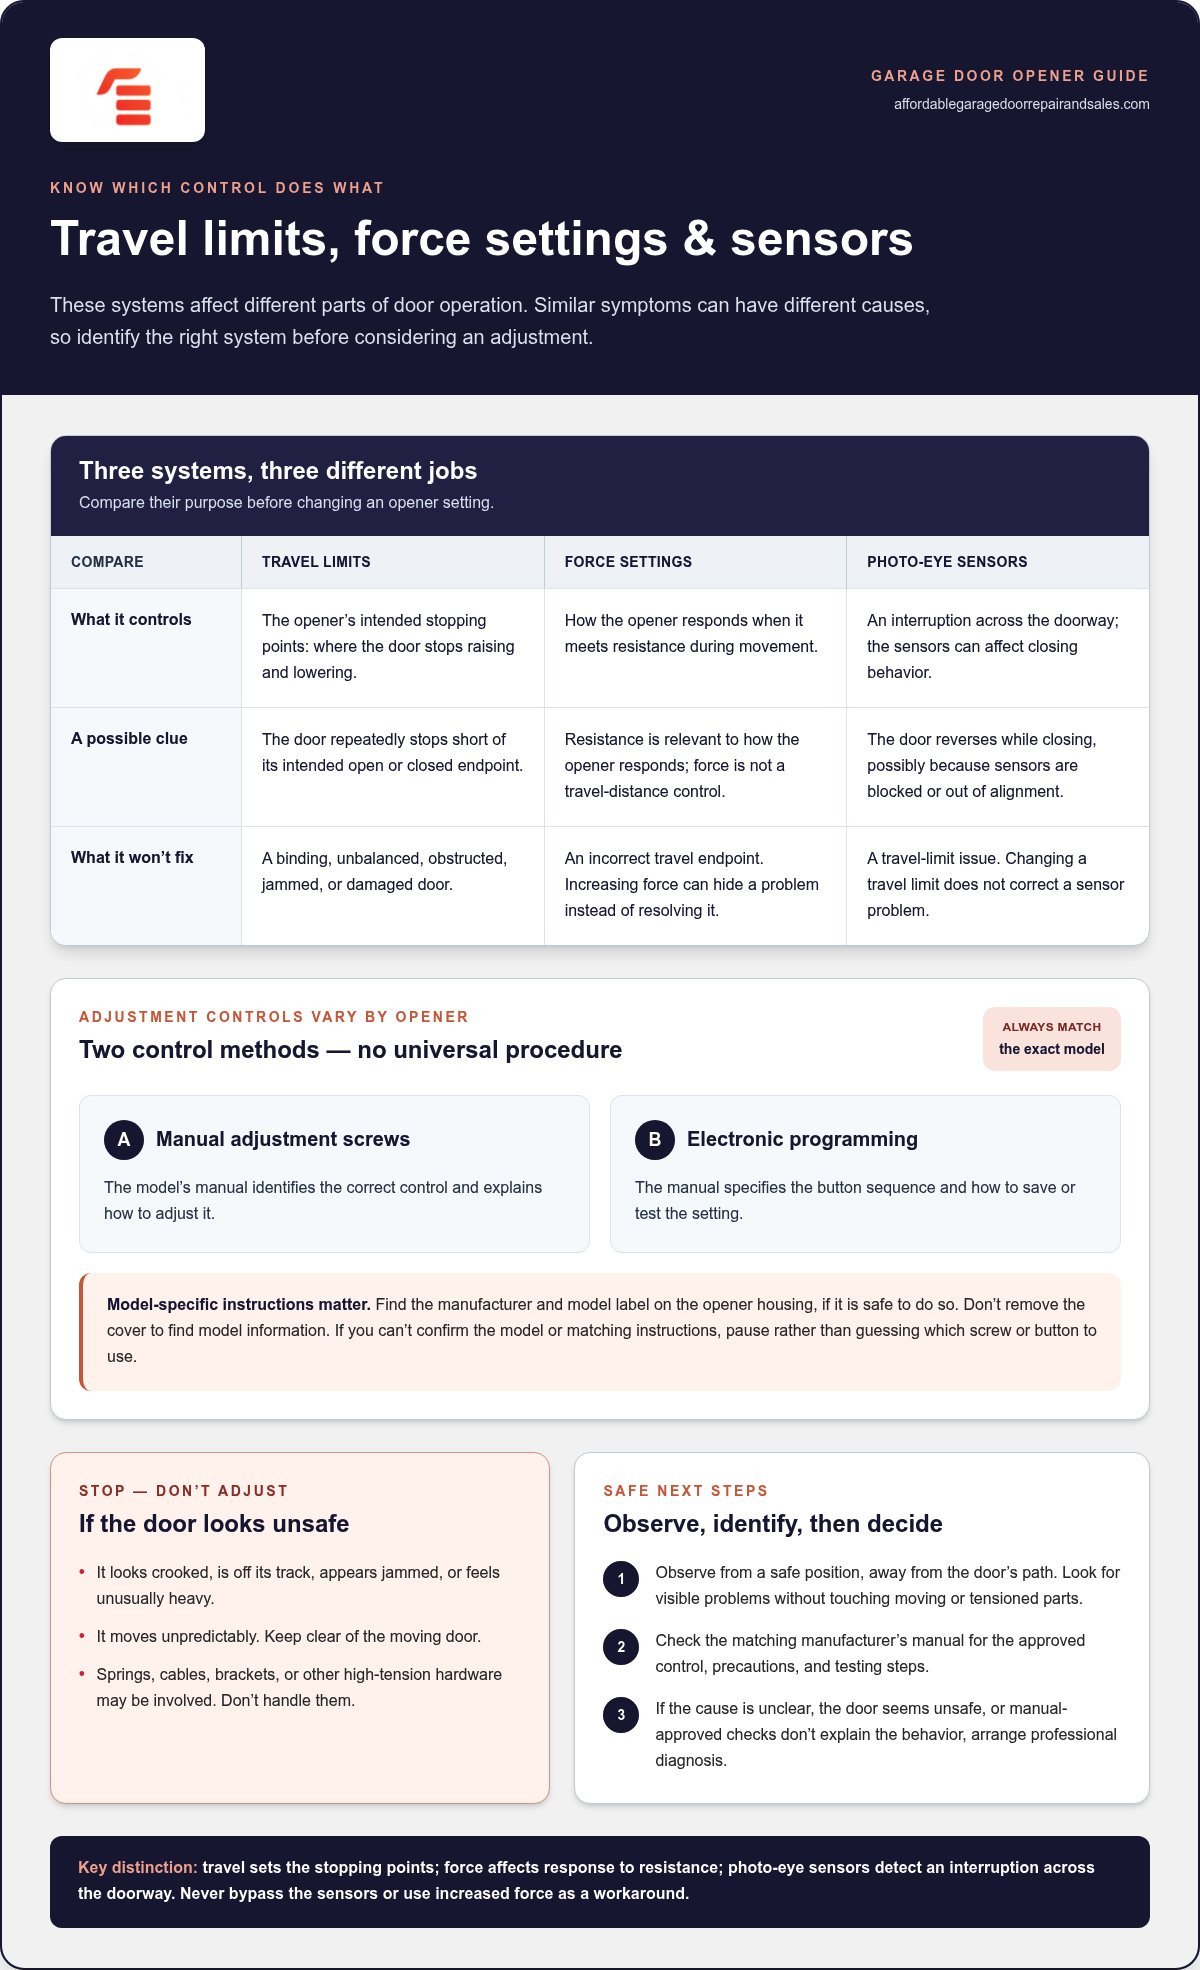
Travel limits differ from force settings. A travel setting determines how far the opener moves the door. A force setting affects how the opener responds when it meets resistance. Changing force to compensate for a door that won’t travel correctly can hide a problem instead of resolving it. Don’t increase force or change a setting unless the manufacturer’s instructions specifically call for it.
Similar symptoms can also come from the door or its safety system. A spring problem may make the door unusually heavy or unbalanced. Damaged cables, an obstruction in the track, worn rollers, or a jammed door can restrict movement. Photo-eye sensors that are blocked or out of alignment may cause the door to reverse while closing, even when the travel limit isn’t the cause.
Stop and don’t adjust the opener if the door looks crooked, has come off its track, appears jammed, or feels unusually heavy. Don’t handle springs, cables, brackets, or other high-tension hardware. These parts can be hazardous. Keep clear of a door that’s moving unpredictably. If you can’t confidently identify a simple travel-setting issue, arrange a professional diagnosis before attempting an adjustment.
How garage door travel limits work across different opener controls
Travel-limit controls aren’t laid out the same way on every garage door opener. One model may use adjustment screws, while another may require electronic programming with buttons on the unit or a wall control. Even similar-looking openers can have different instructions, so don’t assume a procedure applies based on appearance alone.
How to identify the opener model and its travel controls
Look for a manufacturer name and model label on the opener housing. Use a ladder only if it’s stable and you can reach the label safely. Don’t remove the cover or take the unit apart to find model information. Check the label from a safe position, or look for the owner’s manual and product paperwork.
Once you have the model information, consult the manual for the manufacturer’s terms for travel limits and the approved adjustment method. The instructions should identify the relevant controls and explain any precautions or testing steps. If you have a compatible LiftMaster opener, use its matching owner’s manual. Don’t treat instructions for one model as a universal procedure.
If you can’t confirm the model or find instructions that match the opener, pause. Guessing which screw or button to use can change the wrong setting or make operation less safe.
Travel settings versus force and safety sensors
Manual adjustment screws and electronic programming are different control methods. For a screw-based unit, the manual identifies the correct control and explains how to adjust it. For an electronically programmed unit, it specifies the button sequence and how to save or test the setting. There’s no universal number of turns, button sequence, or adjustment amount.
Keep the three systems distinct:
- Travel limits set the opener’s intended stopping points.
- Force settings affect how it responds to resistance during movement.
- Photoelectric safety sensors detect an interruption across the doorway and can affect closing behavior.
A sensor issue won’t be corrected by changing a travel limit, and increasing force isn’t a safe workaround for a door that keeps stopping or reversing. Never bypass the sensors. If the manual-approved checks don’t explain the behavior, a technician can diagnose the opener and door rather than relying on trial and error. For unresolved garage door movement, professional garage door repair is a practical next step.
Is a travel-limit problem causing the door to stop or reverse?
A consistent stopping point can be a clue that a travel setting needs attention, but it isn’t proof. If the door stops at the same point before reaching its intended open or closed position, an endpoint may be set incorrectly. A gap beneath a closed door may also warrant checking the manual’s close-limit guidance. Incomplete travel and reversal can also result from mechanical resistance, an obstruction, or a safety-sensor issue.
Observe the door from a safe position, away from its path. Look for visible problems without touching the door, tracks, cables, springs, or other moving or tensioned components. These clues can help you decide whether to consult the manual or stop troubleshooting, but they can’t confirm a diagnosis.
| Symptom | Possible cause | Safe observation | Recommended next step |
|---|---|---|---|
| Door consistently stops short of fully open | Open travel setting, obstruction, or restricted movement | Note whether it stops at the same point; look for visible objects in the door’s path | Check the model-specific manual if no damage or obstruction is apparent |
| Door closes but leaves an unexpected gap | Close travel setting, obstruction, or door alignment issue | Observe the gap and whether the door appears level | Review the manual’s close-limit guidance; stop if the door is crooked |
| Door reverses while closing | Sensor interruption or misalignment, resistance, or another opener issue | From a safe position, check for visible objects near the sensor path and observe sensor indicators if provided | Follow the manual’s sensor checks; seek service if reversal continues or sensor status is unclear |
| Door moves unevenly, drops, or makes a sudden loud noise | Possible spring, cable, track, or other hardware problem | Look only from a distance for a crooked door, frayed cable, or visible damage | Stop operating the door and arrange professional service |
Know when to stop troubleshooting
Don’t attempt to adjust garage door travel limits if the door is crooked, off track, unusually heavy, or jammed. A falling door, frayed cable, damaged spring, or sudden loud noise can signal a hardware concern that a setting change won’t fix. Keep clear and don’t touch tensioned parts.
If the door reverses repeatedly, or you can’t tell whether the photoelectric sensors are blocked or aligned, stop experimenting. Don’t increase force or bypass a sensor to make the door complete a cycle. A technician can assess the opener and door safely. Symptom clues are a starting point, not a confirmed diagnosis.
How to adjust garage door travel limits using your opener’s manual
Begin only after identifying the opener’s make and model, confirming you have the correct manual, and deciding that a travel limit is a likely cause. The steps below are a safety-first framework, not a universal control sequence. Follow the manual’s exact directions, including its precautions, adjustment increments, and testing method.
Before changing an open or close limit
Clear people, pets, vehicles, and loose objects from the doorway and the door’s path. Make sure the door appears stable and isn’t crooked, jammed, or unusually difficult to move. If you see damaged hardware or anything that concerns you, stop and arrange professional service. Don’t touch springs, cables, brackets, or other tensioned components.
Before adjusting, check that the symptom matches the specific limit you intend to change. Confirm that the manual applies to your opener and identifies the correct control. If you’re unsure about the model or instructions, don’t guess.
Make a cautious adjustment and test the door
- Review the manual’s safety instructions. Follow its directions for preparing the opener and accessing the control. Don’t remove covers or handle wiring unless the manufacturer specifically instructs you to do so safely.
- Identify only the relevant travel setting. Use the manual to distinguish the open limit from the close limit. Don’t adjust force settings to compensate for incomplete travel or reversal.
- Make the prescribed small change. Follow the model-specific instructions for adjustment screws or electronic programming. Change only the named limit, using the increments and sequence in the manual. There’s no universal number of turns or button sequence.
- Test as directed. Keep the area clear and observe the door through the full test cycle required by the manufacturer. Check whether it travels smoothly and stops at the intended endpoint. Don’t force the door against the floor or bypass a safety device.
- Stop if the result is wrong. If the door binds, reverses, moves unpredictably, or still stops short, stop operating it. Don’t keep changing settings to chase the symptom.
The safe approach to adjusting garage door travel limits is to identify the correct opener, follow its manual, make a limited change, and verify the result. If the manual-approved adjustment doesn’t resolve the issue, or the door appears unsafe, contact a technician for diagnosis. Arrange professional garage door repair rather than continuing to experiment with the opener.
After adjusting travel limits, confirm safe operation or call a Washington technician
A setting change isn’t complete until you’ve checked how the door operates. Use the test procedure in your opener’s manual, keep people, pets, vehicles, and objects clear, and observe the full movement from a safe position. Don’t stand under the door or rely on a single partial movement to judge the result.
What should a successful adjustment look and sound like?
The door should move smoothly to its intended open and closed positions, without binding, repeated reversal, or signs that the opener is straining. At the floor, it should stop at the intended closed position without being driven hard against it. Watch for uneven movement or a door that appears to shift out of level. If you’re unsure whether its movement is normal, stop rather than making more adjustments.
Use this manufacturer-guided checklist:
- Confirm complete travel. Observe a full opening and closing cycle, and check that the door reaches the intended endpoints.
- Watch and listen. Stop the test if the door binds, reverses unexpectedly, moves unevenly, or the opener makes an unusual straining sound.
- Check the safety systems. Follow the manual’s exact procedures and pass criteria for testing the safety-reversal system and photoelectric sensors. Don’t bypass a sensor or substitute an improvised test.
- Stop if the result is uncertain. If a safety test fails or you aren’t confident the door is operating safely, discontinue use until it can be assessed.
A successful adjustment should address the original symptom without creating a new one. Don’t change force settings to make a test pass, and don’t continue operating a door that behaves unpredictably.
When should a homeowner call for garage door repair?
Arrange a professional diagnosis if the correct manual-based adjustment doesn’t resolve the original problem, or if the door still reverses, stops short, or leaves an unexpected gap. A spring, cable, off-track, opener, or safety-system concern may need attention beyond an adjustment. Leave damaged or unstable hardware alone. In urgent situations where door failures or electrical faults result in immediate lockouts and safety hazards, 24/7 emergency assistance providers like DirectHulp24 demonstrate how rapid intervention helps resolve critical domestic emergencies.
Affordable Garage Door Repair & Sales LLC provides garage door repair and safety inspections across Washington, with regional locations in Everett, Ellensburg, Spokane, Pasco, and Yakima. Its service coverage includes communities such as Puyallup, Seattle, Tacoma, Auburn, and Wenatchee as well. If the opener may need replacement, consult the manufacturer’s guidance and compare suitable options before deciding.
If you’re not confident the door passes the manufacturer’s checks, request help with garage door service. A technician can assess the door and opener and help determine a safe next step.
Make the Next Garage Door Check a Safe One
Travel limits set where the opener stops, but they aren’t a fix for every door that stops short or reverses. Before deciding how to adjust garage door travel limits, confirm the opener model and follow its manual. Make only the specified adjustment, then check the full cycle and safety systems as directed. If the door moves unevenly, seems damaged, or still behaves unpredictably, stop troubleshooting and seek professional diagnosis.
Affordable Garage Door Repair & Sales LLC provides residential and commercial garage door repair and safety inspections for communities across Washington, including Everett, Puyallup, Seattle, Tacoma, Auburn, Wenatchee, Yakima, Pasco, Ellensburg, and Spokane. If the door still won’t travel correctly, get help diagnosing your garage door.
A careful check can help you distinguish a setting issue from a problem that needs attention. Follow the manual, keep safety first, and take the next step with confidence. For homeowners tackling broader upkeep projects alongside garage maintenance, professional services such as americanhandymanknox.com provide a dependable resource for general home repairs.
Frequently Asked Questions
How do I adjust the travel limit on my garage door opener?
Identify the opener’s make and model, then follow the matching owner’s manual. The manual shows whether your unit uses adjustment screws or electronic programming, which travel setting to change, and how to test it. Clear the door’s path and stop if the door or hardware appears damaged or unstable. Make only the prescribed adjustment, then observe a full cycle and follow the manual’s safety-test instructions.
What is the difference between garage door travel limits and force settings?
Travel limits set the opener’s intended stopping points as the door opens and closes. Force settings affect how the opener responds when it encounters resistance. They serve different purposes, so changing force isn’t a substitute for correcting a travel setting or addressing a mechanical problem. Don’t increase force to make a door complete its cycle. Check your opener’s manual, and stop if the door binds or reverses repeatedly.
Why does my garage door stop before it reaches the floor?
A close-limit setting may be one cause, but it isn’t the only possibility. An obstruction, a door that binds, or a problem with the photoelectric sensors can also interrupt closing. From a safe position, look for visible objects in the door’s path and note whether the door appears crooked or moves unevenly. If nothing obvious explains it, consult the opener’s manual rather than changing settings by guesswork.
Why does my garage door reverse after closing?
If the door reverses as it’s closing or just before reaching the floor, possible causes include an obstruction, sensor interruption or misalignment, resistance, or an incorrect travel setting. Observe the behavior from a safe position and check for visible objects near the doorway or sensor path. Don’t bypass the sensors or raise the force setting. If reversal continues or the cause is unclear, stop testing and arrange a professional diagnosis.
Can I adjust garage door travel limits myself?
Yes, if you’ve confirmed the opener’s model and instructions, the door appears stable, and the manual describes a homeowner adjustment. To learn how to adjust garage door travel limits, use only the steps and small increments specified for your model. Keep people, pets, vehicles, and objects clear during testing. Don’t proceed if the door is unusually heavy, damaged, crooked, or off track, or if the manual is unavailable.
Do all garage door openers use adjustment screws?
No. Some openers use manual adjustment screws, while others use electronic programming through controls on the unit or a wall control. The layout and steps vary by make and model, even among openers that look similar. Find the model label without dismantling the unit, then check the matching owner’s manual. If you can’t confirm which controls set travel, pause rather than trying a generic screw or button sequence.
When should I call a technician to fix garage door travel limits?
Call a technician if the correct manual-based adjustment doesn’t resolve the problem, the door keeps reversing, or a safety test fails. Stop immediately if the door is crooked, off track, unusually heavy, makes a sudden loud noise, or has a damaged spring or frayed cable. Affordable Garage Door Repair & Sales LLC provides repair and safety inspections in Everett, Puyallup, Seattle, Tacoma, Auburn, Wenatchee, Yakima, Pasco, Ellensburg, and Spokane.