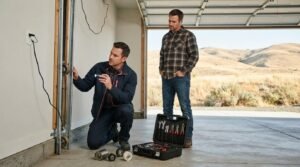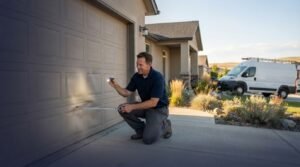
You are ready to head inside for the evening, but as you press the remote, your garage door travels a few inches and then abruptly reverses while the motor light flashes ten times. It’s a common 2026 headache that leaves your home feeling vulnerable and your evening plans stalled. When this happens, garage door safety sensor troubleshooting is the most effective way to restore your peace of mind and security. You don’t need to be a mechanical expert to solve the problem, as most of these issues stem from simple environmental factors rather than total hardware failure.
We understand how frustrating it is when a vital safety feature prevents your home from staying secure. This guide provides a systematic framework to help you identify whether your sensors are just misaligned or if they’ve reached the end of their functional life. We’ll walk you through diagnosing specific LED blink codes, clearing optical obstructions, and verifying that your setup meets current UL 325 height requirements. By following these professional steps, you can often resolve the issue yourself and get your door closed safely without waiting for a technician.
Key Takeaways
- Interpret specific visual diagnostics to confirm if the 10-blink code indicates a simple obstruction or a deeper electrical fault.
- Gain insight into the infrared beam logic that keeps your home secure and ensures your door operates only when the path is clear.
- Follow a logical garage door safety sensor troubleshooting framework to resolve signal interference from sunlight or debris without special tools.
- Differentiate between sensor-related reversals and motor force setting malfunctions to target the correct component for repair.
- Recognize when a blinking light persists despite cleaning and alignment, signaling the need for professional diagnostic tools.
Symptoms of Garage Door Safety Sensor Failure
Identifying the root cause of a door that refuses to close is the first step in effective garage door safety sensor troubleshooting. These sensors, often referred to as photo eyes, act as a continuous fail-safe circuit. If the path is blocked or the sensors lose communication, the motor will prioritize safety over operation. Recognizing the specific behaviors of your system can save you hours of unnecessary labor and help you determine if the fix is a simple cleaning or a component replacement.
The most common symptom is a door that begins its downward travel but immediately reverses to the fully open position. In many residential garage door opener systems, this reversal is accompanied by a distinct “click-click” sound from the motor’s internal relays. If you own a LiftMaster or Chamberlain model, the overhead work light will typically flash ten times to signal a sensor obstruction. Another reliable diagnostic sign is the behavior of your wall-mounted push button. If the door only closes when you maintain constant manual pressure on the wall button, the system is telling you that the safety eyes are either misaligned or disconnected.
How to Tell if Your Door is Reversing Due to Sensors
It’s vital to distinguish between a safety reversal and a mechanical obstruction. A sensor-related reversal usually happens within the first few inches of travel or before the door moves at all. If the beam is broken, the motor board will often prevent the trolley from even engaging. In contrast, a mechanical issue like a frayed cable or a bent track often causes the door to stop or jerk midway through its cycle. If the door moves smoothly but refuses to stay down without the 10-blink warning, your focus should remain entirely on the photo eyes located at the base of the tracks.
Decoding the LED Status Lights
Every modern sensor pair features small LED indicator lights that provide real-time feedback on the system’s health. In a healthy environment, both lights should glow solid without flickering. Most systems utilize a “Sender” and a “Receiver” logic. The sending eye, which often has an amber or orange light, transmits the infrared beam. It usually stays solid as long as it has power. The receiving eye, typically green, is the one that monitors the signal. If the green light is blinking or completely dark, it indicates that the beam isn’t being received. This could be due to physical misalignment, a thick layer of dust on the lens, or a break in the low-voltage wiring connecting the sensor to the motor head.
The Science of Photo Eye Logic: How Sensors Work
Your garage door opener’s logic board acts as the central intelligence of the system, constantly monitoring a low-voltage electrical loop. This loop is a “normally closed” circuit, which means the motor expects a continuous flow of electricity to permit downward travel. If a wire snaps, a terminal loosens, or the beam is blocked, the circuit opens. The system immediately defaults to a safe state, preventing the door from closing on a vehicle, pet, or person. This failsafe design is a core requirement of the federal safety standards for garage door operators, which have mandated secondary entrapment protection for all residential units manufactured since January 1, 1993.
The logic board doesn’t just look for power; it interprets specific data pulses from the sensors. Modern units use pulsed infrared signals to ensure that ambient light doesn’t trick the system into thinking the path is clear when it isn’t. When you engage in garage door safety sensor troubleshooting, you’re essentially verifying that this invisible conversation between the sensors and the motor head remains uninterrupted. If the logic board can’t “see” a solid signal from the receiving eye, it will trigger the safety reversal protocol you’ve likely experienced.
The Transmitter and Receiver Relationship
The system relies on two specialized components: a sender and a receiver. The sender unit, typically identified by an amber or orange LED, casts a focused infrared light beam across the threshold of your garage. Its partner, the receiver, sits on the opposite track and converts that light back into an electrical signal. Precision is mandatory. The beam is narrow, and the receiver’s aperture is small; even a shift of a few millimeters caused by a bumped track or a loose wing nut can break the connection. Ensuring these two eyes are perfectly aligned is often the quickest way to restore functionality.
Common Interference Factors
Environmental variables frequently disrupt this delicate communication. In the Seattle and Everett areas, high humidity often leads to moisture buildup or fogging on the lenses, which scatters the infrared light and prevents a solid connection. During certain times of the year, low-angle sunlight can shine directly into the receiver’s lens, physically “blinding” it and causing a phantom reversal. Dust, spider webs, and even small insect nests are the most common “invisible” obstructions that homeowners overlook. Regular safety inspections can help identify if your sensors are positioned to minimize these local weather impacts and keep your system running reliably through every season.
Step-by-Step Garage Door Safety Sensor Troubleshooting
Before you begin your garage door safety sensor troubleshooting, ensure the work area is safe. Pull the red manual release cord to disengage the door from the opener. This prevents accidental activation while you’re working near the tracks and allows you to test the door’s balance manually. Establishing a safe environment is the first step in adhering to the UL 325 entrapment protection standards that govern all modern residential systems. Once the door is secure, you can focus on the logic-based steps required to restore the infrared connection.
Start with the simplest fix: cleaning and clearing. In the damp climates of Seattle and Everett, moisture buildup and microscopic debris often cloud the sensor lenses, scattering the infrared light. Use a soft, microfiber cloth to gently wipe the glass on both the sender and receiver units. Avoid harsh chemicals that could scratch the plastic casing. Next, look for physical obstructions that might be subtle. A hanging spiderweb, a stray leaf, or a trash can that shifted just enough to clip the beam path are frequent culprits. Even a small amount of dust can break the “normally closed” circuit, causing the 10-blink error code mentioned earlier.
The ‘String Test’ for Perfect Alignment
Tying a string between the two sensors is the most reliable DIY method for verifying alignment. Stretch the string taut from the center of the sending lens to the center of the receiving lens. Use a small line level to ensure the path is perfectly straight and horizontal. If the string isn’t level, adjust the mounting brackets slightly. Most brackets only require a half-turn of the wing nut to slide into a new position. Be careful not to strip the screws during this process. Once the solid LED light returns on both units, tighten the nuts firmly to prevent garage door vibrations from loosening them again.
Inspecting the Wiring Harness
If cleaning and alignment fail, you must inspect the wiring harness for physical damage. Follow the low-voltage wires from the sensors up the tracks and across the ceiling to the motor head. Look for “staple-pinched” wires where an installer might have driven a fastener too deep, cutting the insulation. In 2026, homeowners in Washington often find that corrosion at the terminal points is a leading cause of signal loss due to persistent high humidity. If you suspect a broken line, try the “Short Wire” test. Remove the sensors from the brackets and wire them directly to the motor using a two-foot length of fresh wire. If the lights glow solid in this configuration, you’ve confirmed that the issue lies in the pre-installed wall wiring rather than the sensors themselves.

Comparing Sensor Issues vs. Opener Malfunctions
A common mistake in garage door safety sensor troubleshooting is assuming every reversal stems from the photo eyes. While the 10-blink light code is a definitive indicator of sensor failure, other malfunctions can mimic these symptoms. If your door travels halfway and then reverses without the overhead lights flashing, the issue likely lies with the opener’s “force settings.” These settings are internal safety thresholds that tell the motor to stop if it encounters physical resistance. In 2026, most modern openers are sensitive enough to treat a stiff hinge or a frozen bottom seal as a dangerous obstruction.
Isolating the signal source is another way to narrow down the problem. Try holding the wall-mounted push button down continuously. If the door closes only with constant pressure but refuses to move via the remote control, you have confirmed a sensor loop failure. If the door refuses to close even with constant pressure, the motor’s logic board or a mechanical bind is the more probable culprit. A broken spring is a dangerous mechanical failure that often mimics sensor behavior. The motor senses the sudden weight imbalance and triggers a safety reversal to prevent the cables from snapping or the motor from overheating.
When the Obstruction is Mechanical
Mechanical obstructions like a bent track or a flat roller create friction that tricks the motor into a safety reversal. Over time, garage door tracks can shift due to house settling or accidental impact, causing the rollers to bind. Performing a garage door safety inspection helps you identify these structural flaws before they burn out your motor. A door that has slipped “off-track” will often jerk and stop, a behavior that many homeowners confuse with a blocked sensor beam.
Identifying Logic Board and Capacitor Issues
Logic board failure is more complex and often presents as inconsistent behavior. You might notice the sensors work intermittently or smell a faint “burnt” odor near the motor head, which indicates a short circuit. If the board’s circuitry is damaged, it may fail to process the “clear” signal even from perfectly aligned sensors. In these cases, a garage door opener replacement is often more cost-effective than attempting to repair a 2026-era microprocessor board. Capacitors can also leak or bulge, depriving the motor of the torque needed to overcome the initial weight of the door.
If your troubleshooting steps don’t yield results, you may have a deeper electrical short or a mechanical imbalance. Contact Affordable Garage Door Repair & Sales LLC for a professional diagnostic to ensure your home remains secure and functional.
When to Call for Professional Garage Door Repair
While basic garage door safety sensor troubleshooting resolves most alignment and debris issues, certain symptoms indicate a deeper system failure. If you’ve meticulously cleaned the lenses and verified the alignment with a string test but the diagnostic lights continue to flash, the problem likely resides within the motor’s internal circuitry. Homeowners should avoid opening the motor casing to inspect the logic board, as this involves high-voltage components and complex wiring that require specialized diagnostic tools to test safely.
Physical damage to the system is another clear indicator that professional intervention is necessary. If a vehicle has struck the sensor brackets or the door track is visibly bent, the structural integrity of the safety loop is compromised. These impacts often cause micro-fractures in the sensor housing that allow moisture to seep in. In the Washington climate, recurring failures that trigger every time the temperature drops or the humidity rises often point to these internal shorts. When the system becomes unpredictable, it’s no longer a reliable safety device for your family or property.
Why Professional Calibration Matters
A certified technician doesn’t just restore the infrared beam; they calibrate the entire operating system to meet current safety benchmarks. This process includes testing the “Auto-Reverse” sensitivity and measuring the downward force to ensure the door reacts instantly to any obstruction. Securing an emergency garage door repair ensures that your home’s largest moving part operates within legal safety tolerances. This level of precision prevents entrapment risks and extends the lifespan of your motor by reducing unnecessary strain during the closing cycle.
Affordable Solutions Across Washington State
Affordable Garage Door Repair & Sales LLC provides dependable support throughout the Seattle metro area, Everett, Tacoma, and Spokane. We maintain 24/7 availability for those critical moments when a door refuses to secure at night, leaving your garage and home vulnerable. Our team offers transparent advice on whether a component repair is viable or if a smart upgrade to your safety system is a more resilient long-term investment. By partnering with a local expert, you ensure that your garage door remains a stable and secure entrance for your home through every season.
Restoring Security to Your Garage Entrance
Maintaining a functional safety system is essential for the daily security and convenience of your home. Most issues are resolved through simple lens cleaning or precision alignment using the string test. By understanding the logic behind the infrared beam, you can confidently determine when a quick DIY fix is sufficient and when the system requires deeper electrical analysis. It’s a systematic approach that ensures your garage door remains a dependable asset rather than a source of frustration.
If your attempts at garage door safety sensor troubleshooting haven’t restored the solid green light, it’s time to consult a specialist. Dealing with intermittent electrical signals or bent tracks requires the right diagnostic tools and technical expertise. Our team of local Washington experts is ready to help with 24/7 emergency service and professional safety inspections to keep your system in top condition. You don’t have to struggle with a door that won’t secure when a reliable solution is just a consultation away.
Get a Free On-Site Estimate for Your Sensor Repair Today and enjoy the peace of mind that comes with a perfectly calibrated door. We are here to ensure your home stays safe and accessible through every season.
Frequently Asked Questions
Why is my garage door sensor light blinking green?
A blinking green light on your receiving sensor indicates that the infrared signal is being interrupted or the units have drifted out of alignment. The receiving eye needs to see a steady beam from the sending unit to permit the door to close. In the Seattle area, high humidity often causes fogging on the lens, which scatters the light. Cleaning the lens with a microfiber cloth is a key step in garage door safety sensor troubleshooting.
Can I bypass garage door sensors to close the door?
You can manually bypass the sensors by pressing and holding the interior wall-mounted push button until the door reaches the floor. This “constant pressure override” is a standard safety feature that allows you to secure your home even if the photo eyes are malfunctioning. However, your remote controls and smart apps won’t work for closing until the sensor loop is repaired. This ensures the door only operates unattended when all safety systems are active.
How do I know if my garage door sensors are out of alignment?
The most immediate sign of misalignment is one LED glowing solid while the other is blinking or completely dark. Vibrations from heavy use in cities like Tacoma or Spokane can loosen the wing nuts on the mounting brackets over time. You can verify the path by stretching a string between the two sensors. If the string doesn’t hit the center of both lenses, gently adjust the brackets until both lights stay solid without flickering.
Will sunlight really stop my garage door from closing?
Direct sunlight can physically blind the receiver’s infrared eye, causing a “phantom reversal” where the door opens for no apparent reason. This washout effect is most common during the spring and autumn months when the sun sits lower in the sky. If you experience this in Yakima or Pasco, you can install small clip-on sun shields or swap the positions of the sender and receiver units to place the receiver in a more shaded area.
How much does it cost to replace garage door sensors?
A replacement pair of safety sensors typically costs between $25 and $80 for the hardware alone. Universal sensor kits are often found on the lower end of that scale, while brand-specific OEM components for newer 2026 models can range toward the higher end. While the parts are relatively inexpensive, a professional diagnostic is often necessary to ensure the failure isn’t actually caused by a short circuit in the motor’s logic board or damaged wiring.
Can I use any brand of sensors with my garage door opener?
It’s generally recommended to use sensors that match your opener’s brand to ensure full compatibility with the logic board’s pulse frequency. While some universal sensor kits are available, they don’t always support the advanced diagnostic telemetry found in modern LiftMaster or Genie units. Using OEM parts ensures your garage door safety sensor troubleshooting remains straightforward and that your system stays compliant with the latest UL 325 safety mandates for residential operators.
Why does my garage door close halfway and then open again?
A door that reverses midway is usually reacting to a mechanical bind or a “force setting” issue rather than a sensor failure. Sensors typically trigger a reversal at the very beginning of the cycle or just before the door touches the ground. If the door stops halfway, check the tracks in your Auburn or Puyallup garage for debris or bent rails. This behavior suggests the motor is sensing physical resistance and reversing to prevent damage to the opener.
What kind of wire is used for garage door sensors?
Garage door sensors typically use 2-conductor, 20-gauge or 22-gauge bell wire, which is similar to the wire used for doorbells or thermostats. In damp Washington environments, this low-voltage wire can eventually corrode at the staple points or terminals. If you’re replacing the wire, ensure it is securely fastened to the wall and ceiling to prevent it from tangling in the moving parts of the door. Avoid using thicker wire, as it may not fit the sensor terminals.